Friday, 17 December 2021

Oppo Air Glass- AR Smart Glass

Oppo Air Glass

Oppo Air Glass, an AR device, is going to be released next year. Oppo Company defines it as an “assisted reality” product. We have given here its details, availability, and features.

Oppo Air Glass Features:

Processor: 

The device comes with a Qualcomm Snapdragon 4100 processor. If you consider the weight of the device, you find it is only 30g (about 1oz). According to the company, the device should work 3 hours continuously and 40 hours on standby.

Design: 

This product has two frame designs that are a silver half-frame and a black full-frame. Every frame comes in two sizes. This frame is produced in a CNC technique. There is a magnetic port inside of the frame, which is used to connect more conventional glasses. Due to the unique and attractive design, this device becomes a stylish tech accessory for regular wear.

When it comes to the feasibility of the glass design, you get to know that Oppo is also releasing spectacles frames in Black and Silver colors. When it comes to the Black color option, you will get a full-frame design. But the Silver variant is available in half-frame. The product comes with a design that can easily get stuck on the temple. People who wear spectacles can use the device with ease.

Display: 

It comes with a tiny projector with Micro LED tech. The real brightness is up to 1,400 nits in average conditions. Users can operate this through touch, voice, hand tracking, and head tracking. Besides, it can be operated using the Smart Glass application and is available in Oppo’s ColorOS 11 or above.

According to the company, people can use this for notifications and directions. The device comes with features such as teleprompting and real-time translation. Its screen is monochrome and contains 16 or 256 levels of grayscale, but it relies on the type of device you are using. The company said that the product would receive a “limited release” in mainland China. They released their first in-house NPU chip also for enhancing machine learning-related imaging performance. We call this the MariSilicon X.

Projector: 

The company launched the product as a portable, and practical device that you can access with ease. This reality glass is equipped with a Spark Micro Projector with advanced micro-LED. It is a very compact projection system. This projector with micro-led throws the details on two layers of a scratch-resistant Sapphire Crystal. The device's projector consists of a five-lens projection system. On the flip side, oppo Air Glass comes with a Sapphire Crystal which uses a bespoke diffractive optical waveguide.

Connectivity: 

The Air Glass is capable of setting a strong connection with Oppo smartphones and smart watches. As soon as you connect the device, you are capable of managing settings like brightness and sound volume. If you want, you can disable notifications wirelessly. Besides, you can use the control app to launch and disable apps.

When it comes to controlling the notifications, head gestures, voice, and touch are examples of some ways. When you use the device, you merely have to nod your head to open a notification. If you want to dismiss the notification, then you have to shake your head side-to-side. If you're willing to see the notification in full, you need to tap the Air Glass' touch bar that is available on the side. With the help of the glass, you can switch between multiple apps. If you are considering real-time notification alerts, you can use the product for checking weather updates and calendar meetings.

If you talk about other features, these include a teleprompter mode and a translation mode. If you want, you are capable of tapping the touch bar for moving translated text on the glass. The device enables users to enjoy hand gesture tracking features with the Oppo Watch. Through this process, you can move the text. The product can help you to convert the voice into text and then it helps you to translate into a preferred language.

Air Glass Supported Language: 

The device is compatible with the translation between Chinese and English. However, the company said that the device is going to be compatible with Korean and Japanese languages also.

Oppo Air Glass Price & Availability:

Oppo has not yet revealed the price of the Air Glass. According to the virtual conference on Tuesday at Inno Day, this glass will be a limited-edition device. People can get this available in the first quarter of 2022 in China.

The product provides a navigation feature that you are capable of using while walking, running, and cycling. You can enjoy the Baidu Maps because of the collaboration between Oppo and Baidu for the navigation feature.

It is compatible with Wi-Fi and Bluetooth connectivity support. Besides, the product contains a speaker and dual microphones. According to the company, after mobiles, and smartwatches, this glass is going to be the third screen for consumers.

Sunday, 12 December 2021

How to Use Laptop as Monitor for PS4

How to Use Laptop as Monitor for PS4
If you are a gaming lover, you can't deny the power and experience provided by PS4. PS4 is an excellent console for gaming, offering amazing experiences to all gamers.

With PS4, one can enjoy high-resolution Gameplay, multiple options to choose from, and freedom to play for hours. The PS4 console is for all the gaming fans whether they want to play action games, strategies games, etc., all are covered here.

It happens that sometimes other members use TV or it's for repair. Then this might come to mind to replace the screen with your laptop. Or if you are looking for how to use your laptop as a monitor for PS4. Then you are at the right place.

We will discuss different ways to use laptops as monitors for PS4 and many more. So, read the article till the end.

Without further due, let's begin.

How to Use Laptop as Monitor for PS4

It's not a cakewalk to use a laptop as a monitor for PS4 as plugging in an HDMI cable. Neither PS4 nor laptop is designed for HDMI input, and they both have an HDMI output. But no need to be upset; you can still use your laptop as a monitor. It's a bit complicated but possible.

There are so many ways to do so, but the most straightforward ways are via capture card and Remote Play. Here are the easy steps, which take only a few minutes to set up. So, let's check them out:

Using Remote Play To Play PS4 on Laptop

Sony itself offers streaming service/ Remote play to meet the portability needs of every gamer. Remote play provides Mac and PC users the benefit of PS4 Gameplay on their laptops and monitors. It's an effective way to use a laptop as a PS4 as no third-party application is required.

For Remote Play, you will need:

  • Laptop 
  • Stable internet 
  • USB cable 
  • PS4 Console and, 
  • PS4 Account 
 

Step 1: Update & Download

The very first step is to update your PS4 to version 3.5 or above. Then go to the Sony website and download the updated version of the Remote Play app. Make sure the version you have chosen is compatible with your Mac or Windows operating system. It's not hard to download the application as it comes with the installer.

Step 2: Enable

After successful installation, the next step is to enable the Remote Play connection. For this, first, turn on your PS4 and go to settings and enable the Remote Play connection.

Settings → Remote Play connection settings → Enable

It's needed to keep on your console to use Remote Play. It's even better to run in rest mode with "Enabling Turning on PS4 from the network" to save power.

Settings → Power saves settings → Set features in rest mode → Enabling Turning on PS4 from the network.

Step 3: Customize The App Settings.

For optimal performance, you can customize the Remote Play app based on your laptop and PS4.

Step 4: Connect The Controller.

With a USB port, connect the laptop to the PS4 controller. And if you want to connect it wirelessly, hold Share and PlayStation buttons simultaneously on the controller.

After flashing LED lights, connect the controller to the laptop via the USB port. It only takes a few seconds to do so.

Step 5: Playstation Network

The final step is to open the Remote Play app on your laptop then login details related to your PlayStation Network account. But don't forget to turn on your PS4 even in rest mode to connect the console to the laptop.

That's it; now you can enjoy playing pS4 games on your laptop.

Using a Video Capture Card to Play PS4 on Laptop

A video capture card is a mini-sized device that allows users to look at content on any other device from your console and record footage. This device is not that expensive and is available online and offline.

Video capture cards are used by many gamers while streaming and recording Console games, and it's one of the most reliable options.

You will need:

  •  Laptop 
  • Video Capture Card
  • PS4 Console 
  • HDMI Cable 
  • S- Video Connection Cable 

Step 1: Broadband Setup

You can share files and games via broadband, and that's why Your PS4 should be online for making file sharing work. Despite the wireless connection, you can also connect the router with physical cables to laptops and PS4.

Step 2: Video Card Capture Setup

Connect a video capture card with your laptop via a USB port to install the software that comes with the device. High-quality VCCs that support USB 3.0 should be considered as they are less prone to lagging and provide capture resolution set to full HD.

Next, with the help of S- Video cable, connect VCC to PS4. Now, connect HDMI- into video capture card and HDMI-out to PS4 using dual-function HDMI cable.

Step 3: Run the Software

Turn on your console, run a video capture card on your laptop, and see the magic. Your console displays on the screen, and now you are ready to have fun and play.

Will the PS4 run smoothly on a laptop?

Use Remote Play, video Capture Card, or HDMI cable to run PS4 on your laptop smoothly. A strong internet connection is required for smooth running and less lagging between controller and laptop. Also, if the laptop model is low-end, it may struggle to run nicely. To overcome it, adjust resolution settings and fps.

How do I know if the laptop is HDMI input or output?

Most laptops have an HDMI output. It's hard to find one who has HDMI input, and the HDMI output laptop couldn't be connected with other output devices.

Check its specifications to know whether your laptop is HDMI input or output. If it's HDMI input, you can directly connect your laptop to PS4, and if it's HDMI output, you can't directly connect it.

Conclusion

We have discussed the two most effective and easy methods to follow. These methods are less complicated and take a few minutes to set up. Try out these ways when your TV is occupied or you want to play PS4 on your laptop. Video capture cards and remote play are reliable and secure. Don't think twice and try them out.

Thursday, 9 December 2021

Stereo vs Mono Sound

Stereo vs Mono Sound

When it comes to the discussion of Stereo vs Mono, the first aspect that differs them is the number of channels. Monophonic and stereophonic sound use different channels to record and playback audio. A single audio channel is used for Mono signals to record and playback. But for stereo sounds, two audio channels are used for recording and playback purposes. Stereo sounds can generate the perception of width, but it is not possible for mono sounds.

What is Stereo sound?

Stereophonic sound is the creation of two or more independent audio channels. It is designed in such a way that it seems the sound comes from different directions.

What is the Mono sound?

Monophonic sound uses audio in a single channel, and it is centered in the "sound field."

Stereo vs Mono Difference:

Audio Files:

A stereo system allows you to use two speakers. It comes with audio channels like stereo MP3 and WAV files. MP3 contains the information of the left channel, and the WAV files contain data of the right channel. These files control both speakers and ask when to push and pull air.

When you see a digital audio workstation (DAW), look at the waveform of a stereo audio file. You can see two waveforms display their audio channels. But the Mono files have merely a single audio channel.

Playback:

Stereo systems can generate the impression of sound source localization. It indicates users' capability to locate the position of a sound source within a space.

For instance, if any dog barks, you generally can detect the direction of the sound and the distance of its coming. People are capable of localizing sounds with decent accuracy.

Our brain uses typical tricks to use standard concepts to localize sounds. For example, people can detect the sound timing differences between sounds for your left and right ear, sound wave pressure levels, sound wave frequency, dynamic range, and reverberation amount.

Our brain depends on the sound wave timing differences that are useful for deciphering a sound's left/right positioning. When a Sound source is near your left ear, the sound comes first to your left ear. Then, it reaches your right ear. The difference in timing is minimal, but still, it is useful to localize the sound.

If you want, you can mirror the method with the help of a second speaker. Hence, you are required to feed both speakers at the same signal. In this case, it seems to you that your sound source comes in front of you.

Width (X-axis) is a dimension that you can perceive with the help of a stereo system. Other dimensions also follow height (Y-axis) and depth (Z-axis). The collection of these three dimensions forms a 3-D space. It is known as a stereo image. 

Playback System

Ensure that you are hearing any sound or audio taking the help of a pair of headphones or a stereo playback system. Whether you select a stereo playback system, make sure that you keep your head position in an equilateral triangle with the speakers. Hence, the speakers must present at an angle of 45° toward you. Thus, you can make sure that you can perceive the stereo image.

With the help of frequency, you can detect the height where the sound is perceived within a stereo field. If you have high-frequency sounds, you find these localizing above low-frequency sounds.

The depth relies on the relative sound level, dynamic range, and reverberation amount. Sounds having a weak level and less dynamic range usually appear toward the back of the stereo field.

If you use Mono systems, you can only find them using one speaker. These can generate a two-dimensional image of height and depth. You must have two speakers for making the directional timing differences.

Recording:

If you use one Microphone to record a sound source, you can capture a single channel of audio. You can use a single speaker or two to playback a mono recording.

Mono sounds in which you playback with the help of a stereo system, will playback in dual-mono. You need to duplicate the single audio channel and send the signal to both the left and right speakers.

If you are willing to record stereo sounds, you must take the help of two microphones. At the same time, you will record a stereo sound; one of the microphone recordings needs to be panned to the left side whereas the other one to the right side. There are multiple handheld recorders where you can record sound in Stereo, even capture sound using a pair of built-in microphones for recording.

Compatibility:

The single audio file supports Phonograph cylinders, AM radio, FM radio stations, etc. Besides, it is compatible with Disc records, such as 78 rpm and 16⅔, 33⅓, and 45 rpm microgroove. Both these files are used in MiniDisc, compact audio cassette, VCR formats (NICAM Stereo), and TV (NICAM Stereo). These support FM radio in most cases and AM radio broadcasting in rare cases. However, people don't use this in 8-track tape and audio CDs.

Mono Vs Stereo Applications:

People use Mono sound in radiotelephone communications, telephone networks, public address systems, hearing aids. Besides, radio stations also use it for talk shows and conversations. When it comes to Stereo sound, you can find its use in hearing songs, theaters, and radio stations dedicated to music, FM broadcasting, and Digital Audio Broadcasting (DAB).

Stereo vs Mono- Which one is better?

You have to choose according to your need and preference. If you are willing to see a movie with lots of music and environmental sounds, it is better to use Stereo sound. When you use this, you have the feeling like you are in the movie.

But sometimes, you may want to wear only one earbud. In this case, you should choose the other one. This sound can provide the same experience as the whole music, even if you are wearing one earbud.

Conclusion:

Mono sound is used while merely one channel is used for converting a signal to a sound. But the other sound comes while many channels convert many signals to sounds. It entirely depends on you which sound system you are willing to choose.

Frequently Asked Questions:

  • Q. Is it better to record Mono or Stereo?

Whether you are willing to record a vocalist, you need to select Mono as your choice. However, Stereo is better when you record two vocalists or more. You can use this when you are willing to record in a room with unique acoustics. Using Mono, you can get a strong, clear, and upfront sound.

  • Q. Is Stereo better than Mono?

One channel is used for Mono, whereas many channels are used for the other one. It is upon you which one you are willing to use.

  • Q. Is Mono audio good for music?

As you know that the sound is based on one channel. Therefore, it is better to use because you will hear the sound in one direction. The song is available in a very shallow and plain 2D form.

Wednesday, 8 December 2021

How to Make an Operating System from Scratch?

How to Make an Operating System from Scratch

Do you want to make your OS from scratch? It is not mandatory to have knowledge of coding for all. You can create an operating system even though you don't know C or C++ coding. The operating system has the responsibility for adjusting the PC hardware. When you write an OS from scratch, you have to have a strong command of computer science. It should be of a programming language such as C or C++. 

Guide to Build an Operating System From Scratch

Learning the Basics:

  • There should have a little common knowledge of computer science. So, in this case, you can learn introductory Computer Science courses. You should know that to make an operating system. Besides, it needs a strong understanding of algorithms, data structures, computer hardware, and resource management. In this case, many people have degrees, but you do not have to do so. Learn s course for free to know the process of writing this.
  • If possible, try to learn Python, which is a high-level programming language. However, after getting a solid foundational understanding of computer science, you need to learn C and/or C++. You have to master any specific language when you know about computer science. Otherwise, it is impossible to code an operating system without writing solid applications. Beginners are requested to complete their course to C from any site. After completing the course, take the next one available in the list of courses: C Programming: Language Foundations. You should learn Modular Programming and Memory Management and Pointers and Memory Management.
  • If you want, you may try to know about an assembly language. These low-level languages come with a design for communicating with various processors. But different processors use different assemblies like x86 assembly Language for Intel, AMD, VIA, and others. That's why it is essential to know about the version of the processor you are coding. You can get knowledge from the Art of Assembly Language if you want. The book can be got both online and offline. If necessary, then research on the web. You can find the manuals for processor architecture with the help of a Google search ("Intel Manuals," "ARM manuals," etc.).
  • By going through our tutorial, you can understand how to create the operating system. You can take the help of Bare Bones, using which you can write your first simple 32-bit kernel. When this process is finished, you must use Meaty Skeleton to build the structure of the operating system. If you think, take the help of Linux from Scratch. Using the online book, you can make your Linux operating system. You should know that the operating systems which are from 0 to 1 are free books.
  • You need to decide first the purpose for which you want to make the OS. It is essential to know the design that you prefer. Sometimes, you may want to make your PC offer only a specific look. It would be best to consider multiple things before the beginning of the code. The first thing you need to consider is creating the OS with a team of other programmers. If you have a team of developers, you can make the OS quickly. You are merely required to include the project's target, plan, and questions in your public repository.

Building Your Operating System:

  • In this part, your first task should be to select a development environment. It is the place where you have to code the new OS. Usually, people like to use Windows or a flavor of UNIX. However, you can use anything according to your preferences. If necessary, then try to install a UNIX environment. Cygwin or MinGW is an example of this. Ensure that the environment you use comes with a GCC (the Gnu compiler). People who use windows need to install this in Cygwin or MinGW.

Whether you are willing to manipulate object files, you can use Binutils, a collection of tools. If you use Windows, then install this in Cygwin.

However, people use Vim and emacs in UNIX environments. If you are using Windows, you can use Notepad also. If you prefer, then check the Notepad++ out. People can use Perl and/or Python for string manipulation.

  • In this case, you should set a version control system. When you are going to make an OS, you have to write plenty of lines of code.
  • Sometimes, you might not be capable of creating the operating system yourself. Hence, you are required to take the help of a bootloader like Grand Unified Bootloader (GRUB). However, if you have the skill, try to code for a bootloader.
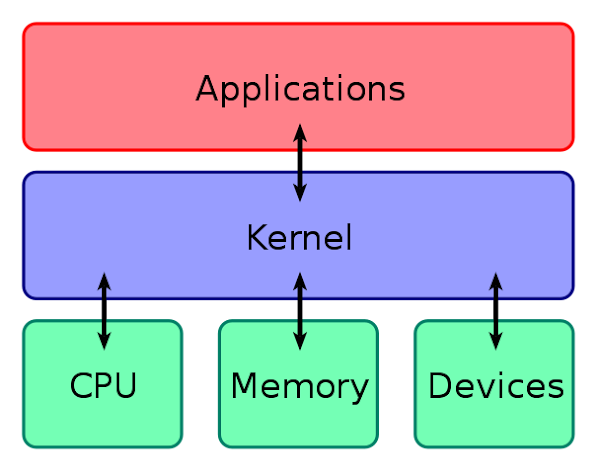
  • You have to select a kernel design that is the core of OS. It is the one that offers an interface between the hardware of the PC and you. Two different types of kernels are available— monolithic kernels and microkernels. In the Monolithic kernel, you can see all the services, whereas, in microkernels, you can see a small kernel with user daemons implementing services. Usually, monolithic ones work quickly, whereas microkernels come with improved fault isolation and reliability.
  • Try to learn small things first, like how to show text, etc. Then, you should move on to the big stuff like memory management and multitasking. If you are willing, try to create a simple 16-bit Operating System rather than taking a big leap. It may not be done entirely if you want a complete system. You should try to build operating systems that are bootable. After that, you can go to the stuff.
  • Use a virtual machine in this case for testing the new operating system. As a result, you are not required to reboot the PC every time, or you don't need to share files from your development computer to the test machine. Take the help of VMWare that is suitable for both Windows and Linux. Take a look at the potential deadlocks and other bugs.
  • Now, your task is to release the option "release candidate." Just upload the code you have tested to the public repository. Users can test the code at any time and report this back if they find any issue on their devices.
  • Finally, your job is to connect with the other OS developers. You can find an entire community of OS developers on the web.

Monday, 11 October 2021

Keynote: New Features

Apple has launched a few new features to update its iWork suite of productivity applications. As a result, Apple users are capable of using documents with ease. Pages will showcase pictures and text in a single-column flow. Thus, users can view documents more easily as well as edit them also. Besides, the latest tools in the keynote are capable of displaying the live camera view of the user. This feature of Apple assists in making presentations more engaging. It can be more collaborative also with plenty of user controls. Numbers come with pivot tables. These are capable of bringing strong data analytics capabilities.

Bob Borchers said that people prefer to use Keynote, Pages, and Numbers. It doesn't matter if they are in their home, office, or any other place. The strong features, easy-to-use capability help th deliver awesome experiences across mobile devices like iPhone, iPad, and Mac. Bob Borchers is the vice president of Apple of Worldwide Product Marketing. 

Nowadays, people can make additional personal and compelling presentations with the help of the latest productivity and collaboration features. Thus, people can easily work with documents on their mobiles. Apple is going to offer full-featured pivot tables for the very first time.

A New Pages Experience Optimized for iPhone:

We generally read documents on iPhone especially compared to any other device. Nowadays, pages deliver seamless performance in reading as well as editing documents. Users can increase the size of the text and thus they can enhance the quality of readability, photos, and drawings. Now you can scroll the tables horizontally. This recent update from Apple allows the Screen view feature to showcase text, pictures, and many others in a single column.

You are capable of using the Screen View for all different word processing documents. Users are not required to set up additionally. You can access the editing tools in Pages. Besides, you can deactivate the Screen view feature whenever you wish. Thus, it helps you to see the page layout of your document before printing or publishing.

Availability:

Recent users of iPhone, iPad and Mac can get Keynote, Pages, and Numbers free in these models. As soon as the update is available, it can be downloaded from the App Store and Mac App Store.

New Ways to Present in Keynote:

Now, keynote presentations become more engaging with the help of strong new tools. The front-facing camera is now available on models like iPhone, iPad, and Mac. Therefore, users of these models can use them for adding live video to the presentations directly. If you are going to attend any lecture, then this mobile feature is going to be very useful. People who represent their presentations via remote through video conferencing applications must get benefits from the feature.

People can use masks, frames, drop shadows, and reflections on any live object. Thus, they can make the object more elegant. If you are a Mac user, then you are capable of using plenty of external cameras. These will improve your live video experience for sure. Using the feature, you can even showcase the attached iPhone or iPads display. People generally use this feature for live demos on their slides.

A new multi-presenter option is now available in these models. Therefore, it enables you to have control over even a shared slideshow from your model. It doesn't matter whether you represent your project remotely or stay in a similar room. When you complete using the feature to your slide, you need to go back to the host. If you wish, you can allow your co-presenter to take over the slide.

Powerful, Easy-to-Use Pivot Tables with Numbers:

This update helps to display information with excellent graphics combination and offers an intuitive interface. As a user, you should always use Numbers to get the most out of the information. The pivot tables allow you to summarize information, group them and rearrange thereafter. Use charts as well as share the pivot information to visualize the tables.

Keynote, Pages, and Numbers are compatible with all the latest translation features of iPadOS 15, iOS 15, macOS Monterey, etc. In addition, a chart is available recently called a Radar chart. With the help of this chart, you can visually compare it with a lot of variables. Thus, users can easily differentiate them. Using the new filter options, you can look for duplicate entries. Besides, you can use it to find any particular value in the document.